Helloooo.
Because you are important and I care about you, I wanted to provide you with some distraction this week so you don’t just spend all of your time eating cheese. So follow along as I tell you the story of the Mulberry House Main Bathroom.
In reality, this modest mill house only has one bathroom and one bedroom for that matter, but it sounds so much more grand referring to it as the main bathroom.
So here are some before pictures to refresh your memory:

This first picture is a good one to help you orient yourself. We are standing in an open doorway looking into the bathroom from the kitchen. To our immediate left, you can see there is a closed door that leads to the bedroom. These doors are both 24″ wide, which I’ve recently learned is wide enough to get a stroller into, but not out of, the bathroom. Immediately to our right is the vanity with the toilet next to it, and then straight ahead is the bathtub shower combo. All neatly organized into 45 square feet.

It had been somewhat recently been updated – fake tile was installed over old wallpaper on the bottom half of the room, robin’s egg blue bead board was installed over old wallpaper on the top half of the room, some fixtures were updated, tile was installed on the floor, and the trim got a fresh coat of white paint. Based on the floating bathroom sink I found in the crawlspace, I’m guessing the whole vanity was new, as was the low flow toilet. And because I’m a big fan of not fixing things that ain’t broke, I wanted to keep most of it, even if it wasn’t to my taste.

However, the bathtub surround was uncleanable, beige, loose, and would have had giant holes in it after I removed the sexy grab bars (scroll up to the first picture if you don’t remember them). The surround needed to come off before I could let anyone shower in there. After using many cleaning products, I was able to get the old cast iron tub clean, but the enamel had worn through in a few places, leaving exposed rust.

Additional attempts at “cleaning” it just made it worse.


I included these last two pictures just to show how incomplete the somewhat recent renovation was.
So anyway, that was our starting point.
The quick and easy bathroom refresh plan was to:
- remove the grab bars and replace the bath surround
- replace the tub faucet set
- reglaze the tub
- caulk gaps above beadboard or add a thicker crown molding
- add trim between beadboard and tile
- paint the beadboard

Removing the grab bars and bath fixtures and then ripping out the old surround was reasonably quick and easy.

But the drywall behind the tub faucet was a little funky / quite water damaged. And the supply pipe was slightly leaking.

Andrew cut out some of the damaged drywall at the bottom so we could replace it.

We went to Home Depot to buy some moisture resistant Purple drywall, a Charlotte, NC local product. And it turns out that full sheets of drywall exceed my Prius’ cargo limits. I never thought I’d see the day. So we had to cut the drywall in the Home Depot parking lot to fit it in the car.
So I just noticed I like to use the word “so” to start sentences.

We got the new drywall cut to fit where the old stuff had been removed but we couldn’t actually put it in until the leaky pipe was fixed.

So I built this paper wall to keep the raccoons from crawling into the bathtub from the crawlspace while I slept until we fixed the leak. And the flip flop cleverly carries the drippy water to the tub so it didn’t soak the wood frame.

The drywall that we didn’t replace still needed a lot of fixing because it seems to have previously been painted a few times and then when the old tub surround was removed, some of the glue pulled off some of the drywall paper. So I had to scrape off as much of the remaining glue and loose paint, then use an oil-based primer to seal the exposed drywall, then patch all of the million holes and gouges. This would all be hidden by the new surround but I wanted a reasonably flat and solid surface to attach the new surround to so that it wouldn’t be as weird and loose as the old one.

This is the tub access panel in the bedroom. You can see the back of my fancy paper wall. We tried our darndest to get the faucet to stop leaking but just could not figure it out. And since we had to call in help and already had the wall wide open, it seemed like a good time to get some of the plumbing updated. I’m finding it hard to believe that I don’t have a picture of the completed shiny new pipes, but I don’t. Just use your imagination.

Oh wait, here it is from the tub side. Isn’t it pretty? This is me pulling out nails so we can put the new purple drywall in now that we have new pipes that don’t even leak.

And if you look closely, you’ll see that there is a new tub surround in this picture. It’s just being held in place with painters tape while we check and double check the measurements before cutting holes for the faucet and valves.

Once we had all the surround pieces trimmed and ready to go, I just had to beautifully spread an absurd amount of adhesive onto the wall and then stick the pieces into place.
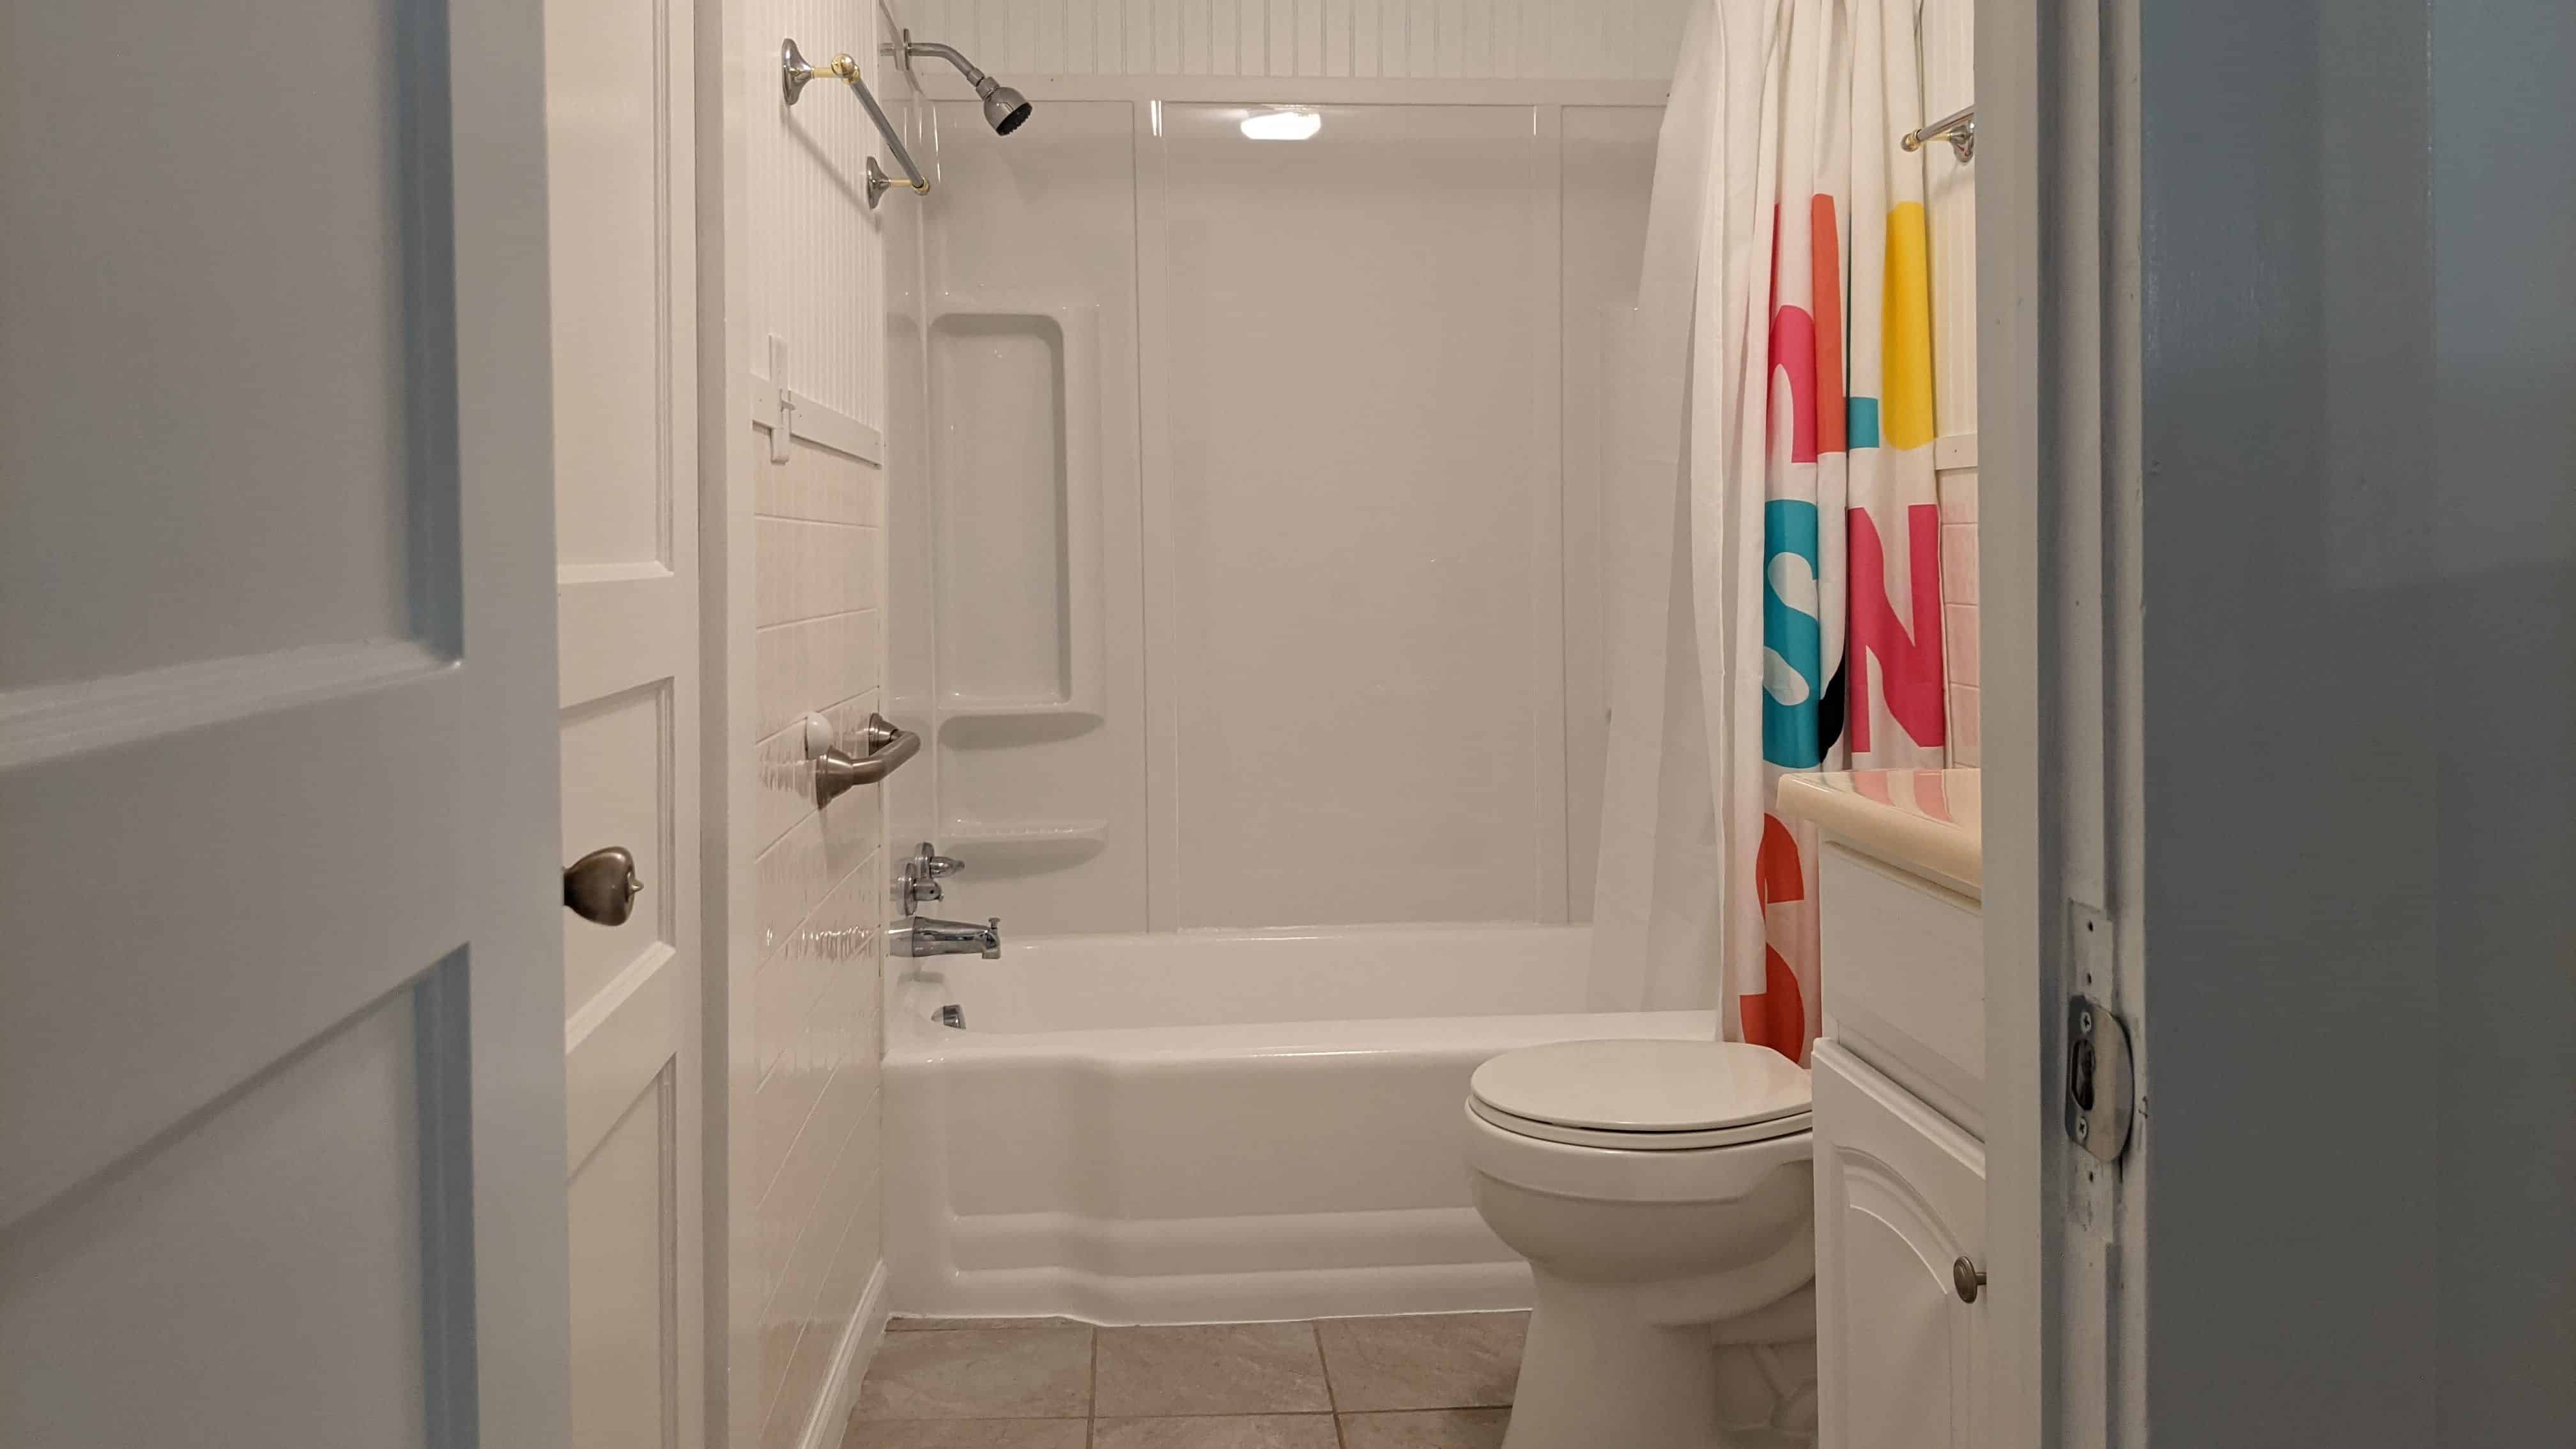
Now if you’re wondering why on earth I didn’t use tile, I can tell you that I definitely considered it. Three things led me to choose a big ‘ol surround instead. First, I wanted to respect the modest roots of this simple mill house. I could have done a basic white subway tile and I think that would have been okay. But it would probably clash with the fake square tiles in the rest of the room. Second, this house was going to be a rental, I wanted cleaning and maintenance to be as foolproof as possible. Third, there is nothing remotely square, level, or plumb about these walls so I didn’t think it would be a great scenario for my very first tiling project. So we chose this 5-piece surround and I’m pretty happy with how it turned out.

We left the tape up for a day or so while all of the adhesive dried. You can also see at the top, that this new surround is slightly shorter than the old one so I’ll have to find a way to disguise that gap, which is fine, because the pieces aren’t all level with one another because nothing was level to start with in this house.

Once the surround was all good, I removed the old drain and trip lever, which I wish I had taken a video of, but luckily this random youtube dude is better at the internet than me. But I took a really gross looking picture at least. And then seemingly failed to take a picture of the new drain but it’s definitely as lovely as you’d imagine so long as you’re imagining something with vintage chrome vibes.

I found a local company to re-glaze the tub leaving it shiny and new within a couple of hours. They did a great job and apparently refinish all sorts of surfaces such as tile, countertops, and sinks and tubs of various materials. But I think if I have a tub that needs refinishing in the future, I’ll be brave enough to have a crack at it myself.

See! It really shines like new, and that’s pretty much where the giant rusty area was.

After the tub was done, all that was left to do was finish up the trim, caulk, and paint. I ended up using vinyl lattice molding to cover all of the transitions. You can see it here between the fake tile and the beadboard and on the edge of the tub surround. I chose it because it would be adequately moisture resistant, is already white, and is relatively flexible and therefore easy to install on my uneven walls. Plus this bathroom clearly needed more plastic components.

I painted the ceiling white. And painted the doors and trim white. And painted the beadboard white. But after I did the first coat on the beadboard, you could see a little bit of the old blue paint still and I decided I really liked that so I made sure that the second coat didn’t get into the grooves. It was a design choice, not laziness, really. The blueness also somehow helped make the off-white of the fake tile stand out less against the bright white everywhere else in the room.

Whenever phase two happens, I might try painting the fake tile on the wall – I’m currently leaning towards a soft shade of yellow or blue. And I might try painting the tile floor, and I might try refinishing the vanity top. Oh, and replacing the weird vintage mirror/medicine cabinet/vanity light thing. But it all works for now. What would you change?
Here are all the details and sources:
Walls: Behr Ultra Interior Eggshell Enamel in Ultra Pure White
Ceiling: Behr Premium Plus Ceiling Flat Paint in Ultra Pure White
Doors and trim: Behr Premium Semi Gloss Interior Cabinet and Trim Enamel in Ultra Pure White
Bathtub surround: Delta Sturdifit 5-piece Easy Up Adhesive Tub Wall in White
Faucet set: Aragon 2-Handle 1-Spray Tub and Shower Faucet in Chrome
Drain stopper and overflow: SimpliQuick Push Pull Bathtub Stopper, Grid Strainer, Innovator Overlflow in Chrome


I’ll be back with more next week!


Leave a Reply