Hello!
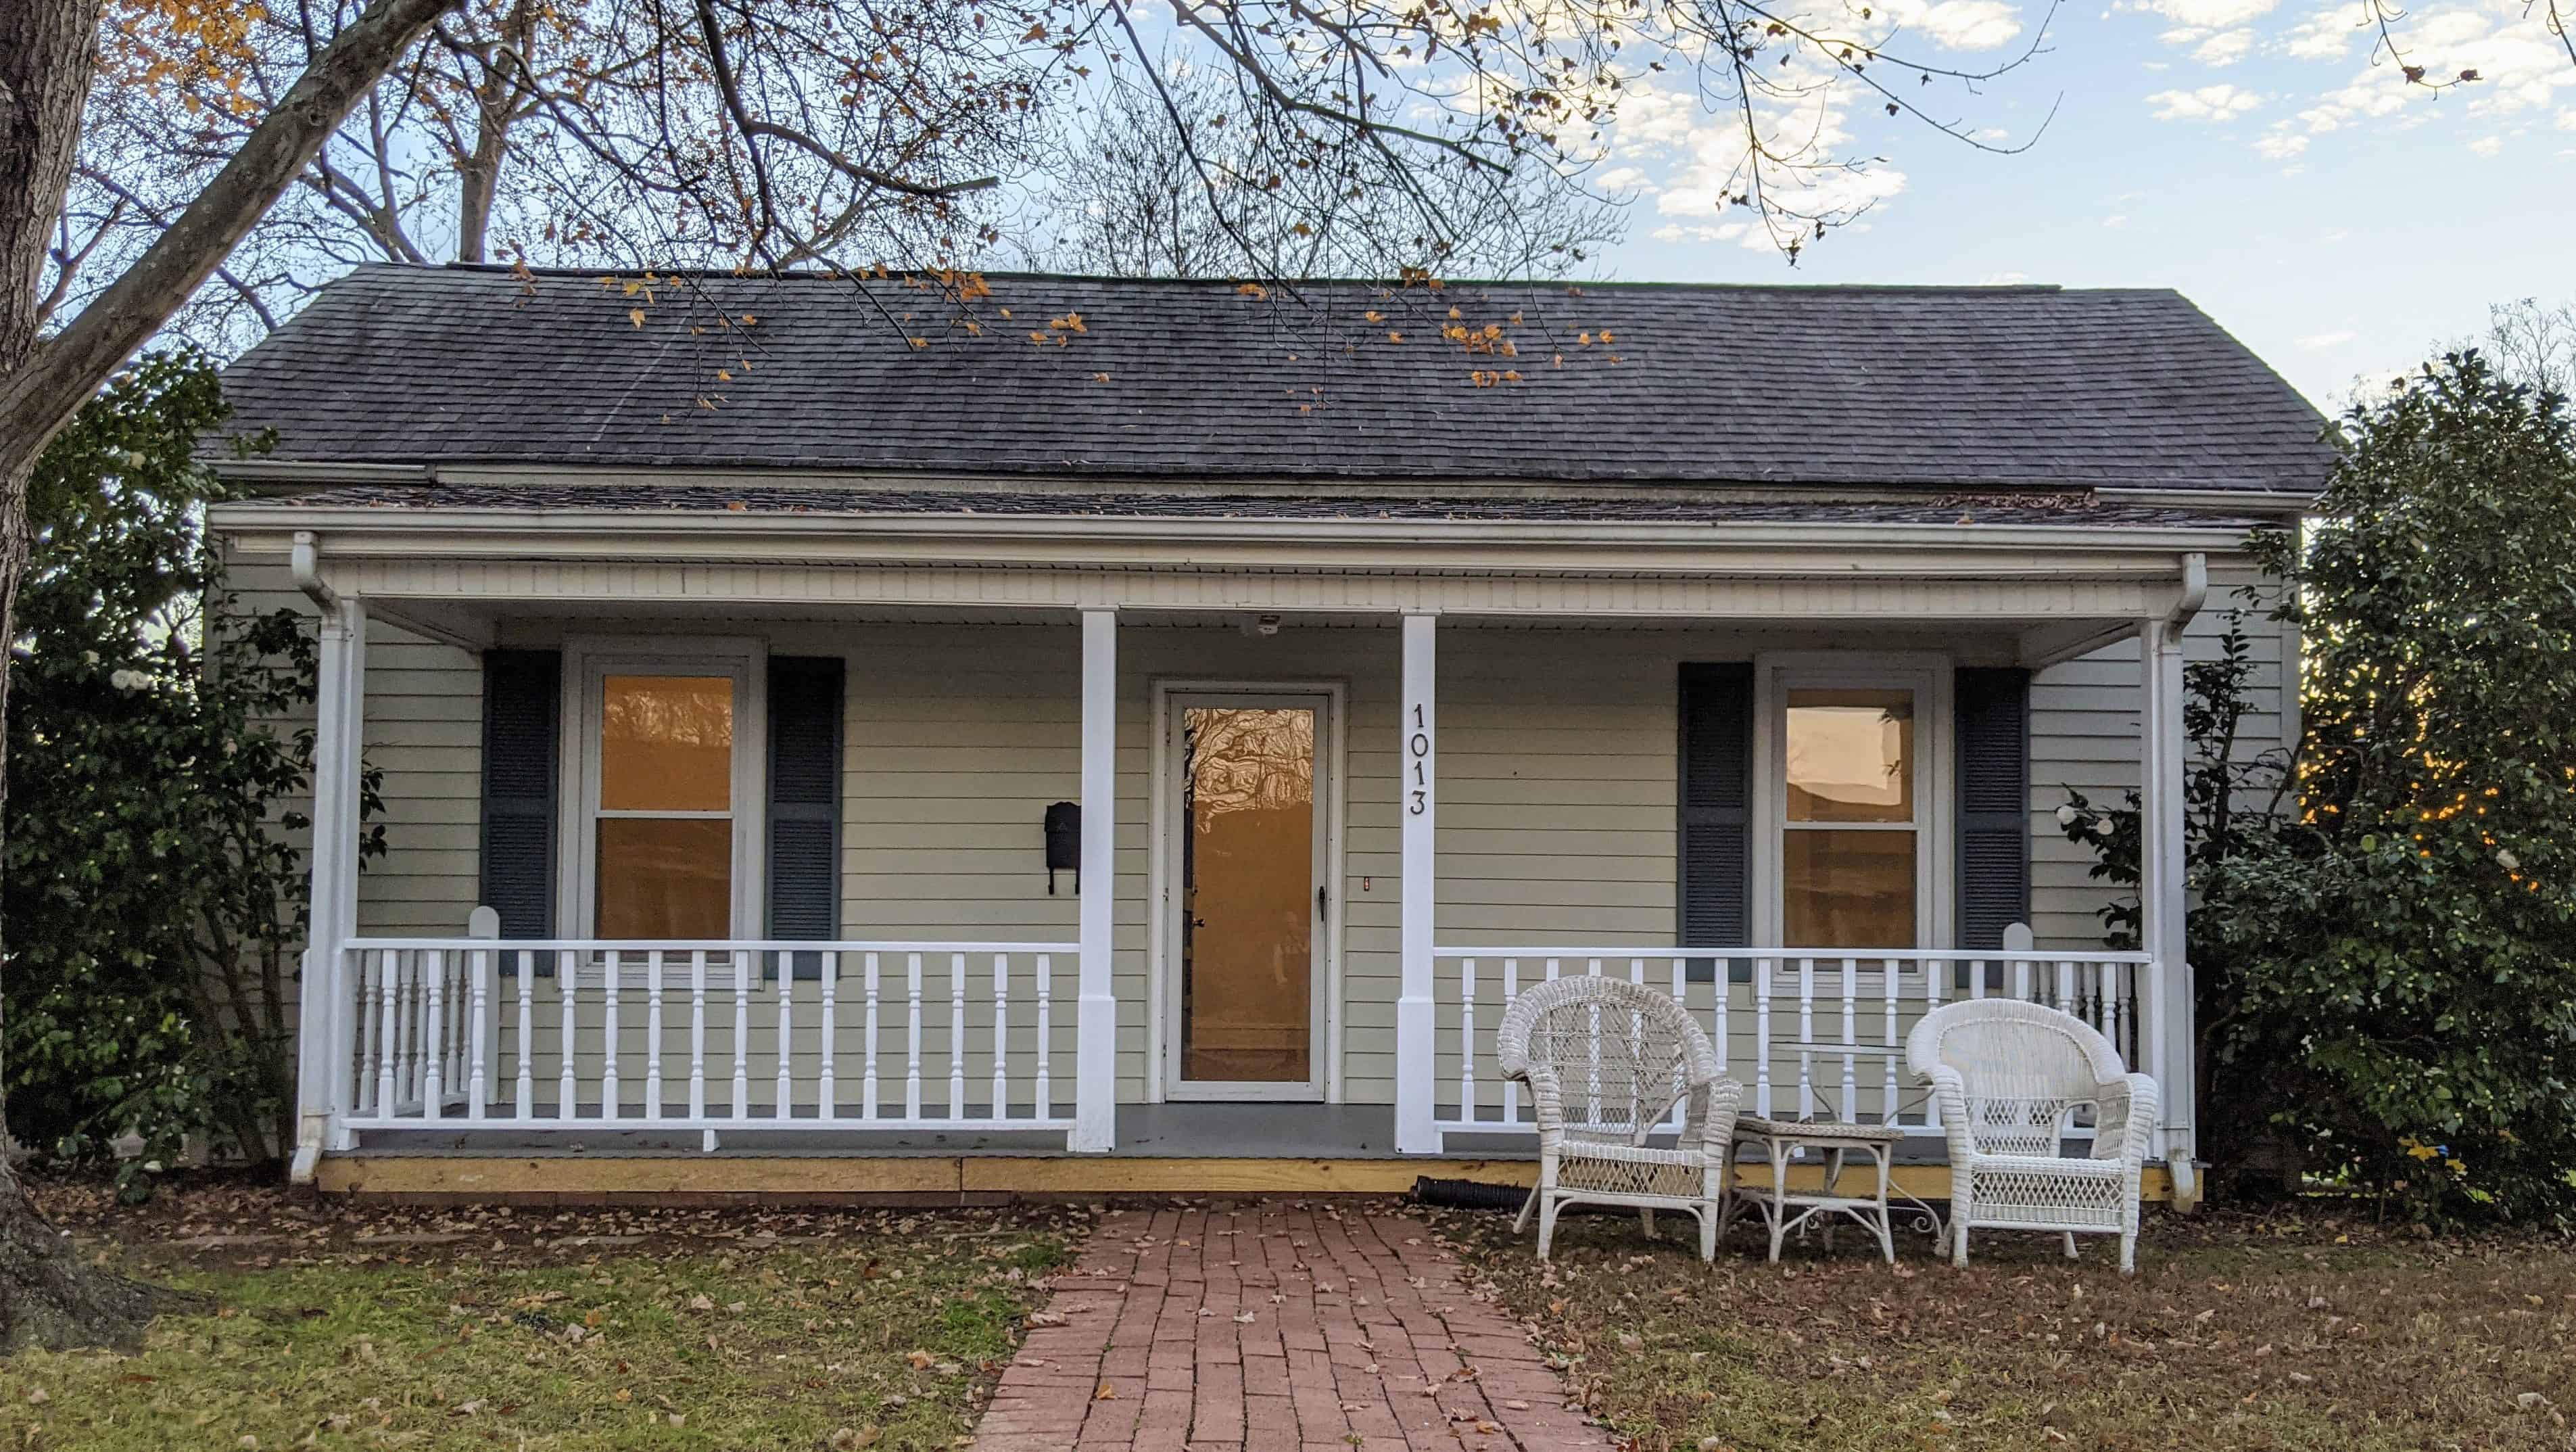
Today, I’d love to show you some of the fixes and little updates we made to the exterior of the Mulberry House.
Here’s what the house looked like when we first bought it:


At this point, the front porch was safe, but definitely rotting pretty heavily, especially around the edges. The railing mostly needed cleaning and painting, but also a few nails here and there since some of the vertical rails were just hanging from the top rail.

For some reason I don’t have pictures of the front door from outside, but this is what it looks like from in the living room. Mostly just dirty with a weird lock that is not actually a deadbolt and doesn’t like to close properly.


The back door situation is a little different. The back door opened to a drop off. I’m unclear as to why there was no landing or steps or anything here, but there wasn’t. The front door had the benefit of being covered by the porch roof so it was pretty well protected from the elements but the back door not so much. It was in pretty rough shape, paint wise. The picture on the right above is from after I was procrastinating one day and just scraped off a bunch of loose paint with basically no effort.
So anyway, that was our starting point.
From the start, the exterior renovation plan was to:
- get rid of the boat
- remove clutter from the yard, crawlspace, and shed
- clean the gutters
- modify the drainage system so water drains away from the house rather than pooling or flowing into the crawlspace
- level out the front walkway so it’s no longer a tripping hazard
- build steps from the back door so it’s no longer a death hazard
- replace the rotting porch boards
- pressure wash the porch, walkway, and siding
- paint the porch
- paint the doors and shutters
As with the kitchen, I was under a bit of a time crunch to get the house habitable so not everything got done as planned. But here’s what we did get done:

I ended up hiring someone to build the back steps. It seemed like it should have been simple enough, but every time I sat down to try to calculate how much lumber I needed, I ended up giving myself a headache. Getting these steps built was definitely a need versus a want for this renovation.


We had also originally intended to fix the porch ourselves. But at some point, we noticed that half of the porch boards were screwed down, obviously with rusted screws. So just the demolition portion of the porch would have taken us forever with our limited tool and skill set. So I hired out the porch board replacement job. The guys removed the railing and ripped out all but the central section of porch boards within a few hours.

Upon removing the old porch boards, we also discovered that the joists supporting the porch were lightly rotting, but also barely being held in place with loose nails. So we had the guys replace those too.


While the guys took only a few hours to remove the old porch boards and joists, I spent the better part of three days priming all of the porch boards. There were just over a hundred of them. Painting the tops (seen here) was easy, But the tongue and groove sides required me to get into all sorts of tight corners. And unfortunately this is super essential because the primer seals the boards to prevent moisture intrusion so the boards don’t expand and cause the porch floor to buckle. As you can see, this absolutely should not be done during autumn. Honestly, only a masochist would choose to take on this particular job.
If you see the hubcap sitting on the driveway, it’s there because this is also the day I blew out one of my tires which Andrew was kind enough to get replaced for me while I primed the boards. Shout out to Andrew’s dad who also came over and helped me paint for a couple hours.

After the new porch joists and boards were installed and the railing put back into place, I put another coat of primer on top of the porch boards. Since I had a little primer left in my paint pan and bucket, I used it to start priming the right side of the railing. You can see it made quite a difference! It took me a few more days to get around to priming the rest of the railing and then actually painting the boards and railing. I have to say that this part of the process was SOOOOO much less tedious than priming the individual boards.

We took the exterior doors off their hinges in order to sand, prime, and paint them on the driveway. Between coats, I was able to provide the same loving treatment to the door frames. This picture was taken after just one coat of paint which is why it looks a little streaky. When mounted back in the door frame, the colour is lot less intense. Which is actually a mistake. We accidently bought the wrong paint colour … we bought the colour that was the closest match we could find to the current colour. Since I didn’t get around to painting the shutters, the door matches them pretty well with it’s fresh coat of paint so I guess that’s good. Phase two will definitely involve a brighter shade of blue on the exterior doors and shutters.

Just like with the “before” pictures, I don’t have a good picture of the front door from the outside, but here it is from the inside. What a difference a few coats of paint and some new hardware make! The icky looking stuff in the door frame is actually some stick-on weather stripping that I had added (after painstakingly scraping off the old stuff), only to discover that it prevented the door from fully closing. So I tried to remove it, but it wasn’t interested in being easily removed, and I wasn’t interested in putting in any more effort removing it.
I also don’t have any good “after” pictures of the back door, probably because after I fixed the screen door so that it now closes, the freshly painted back door just looks like a door hidden behind a screen door.

So what does that leave us with? We still have a boat taking up half of the driveway. The walkway is still a tripping hazard. The drainage is substantially better, but definitely still needs work. And I’d like to paint the doors and shutters a brighter shade of blue. So that’s all for phase two, or possibly some things will get done during weekend visits over the course of this year. Oh, and that bush needs trimming. I hadn’t trimmed as much of it as I would have liked because I was waiting for the million flower buds on it to bloom and they were just starting when this picture was taken. Oh, and Andrew really wants new house numbers.
Here are all the exterior paint details:
Porch floor: Behr Premium Porch and Patio Floor Low-Lustre Enamel in Slat Gray
Porch railing and door frames: Behr Premium Plus Exterior Flat Enamel in Ultra Pure White
Doors: Behr Premium Plus Exterior Satin Enamel in Tidal


That’s it, I’ll talk to you next week!


Leave a Reply